
Step-by-step instructions:
Step 1) Click on “Clear Data” if you have previously connected to a data file.
Next, click on “Choose File” and select the raw data file that you wish to connect to on your hard drive.
After clicking ‘Choose File’ and selecting the appropriate .txt. file, the ‘Genotype File Loaded’ text will display when complete.
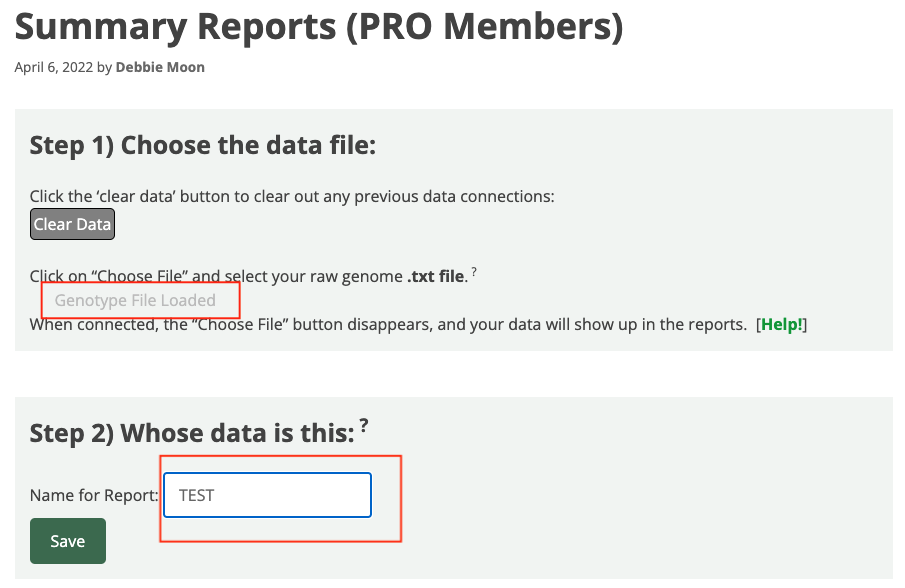
Step 2) Give your data file a name.
This name will also show up on the reports for your clients or family members. For privacy of patient data, please use either a partial name or an ID number for patient data if you are a medical provider.
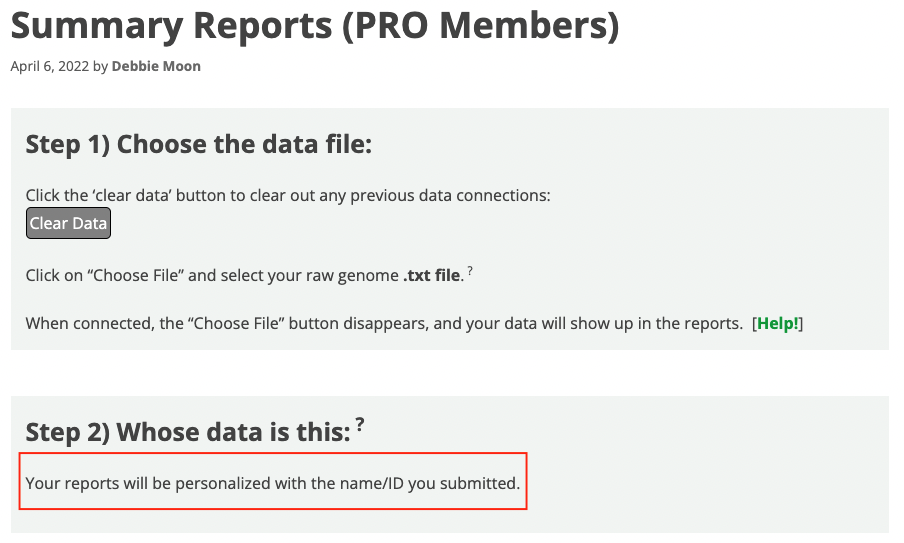
Once the name has been saved, the confirmation will be displayed in Step 2.
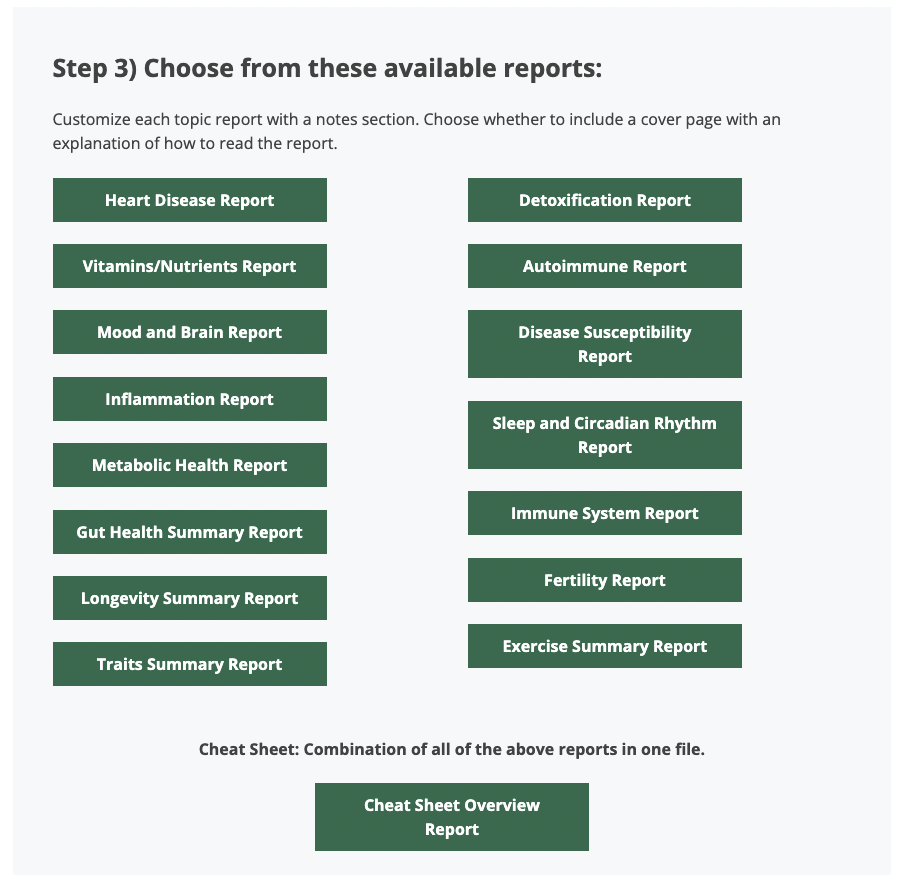
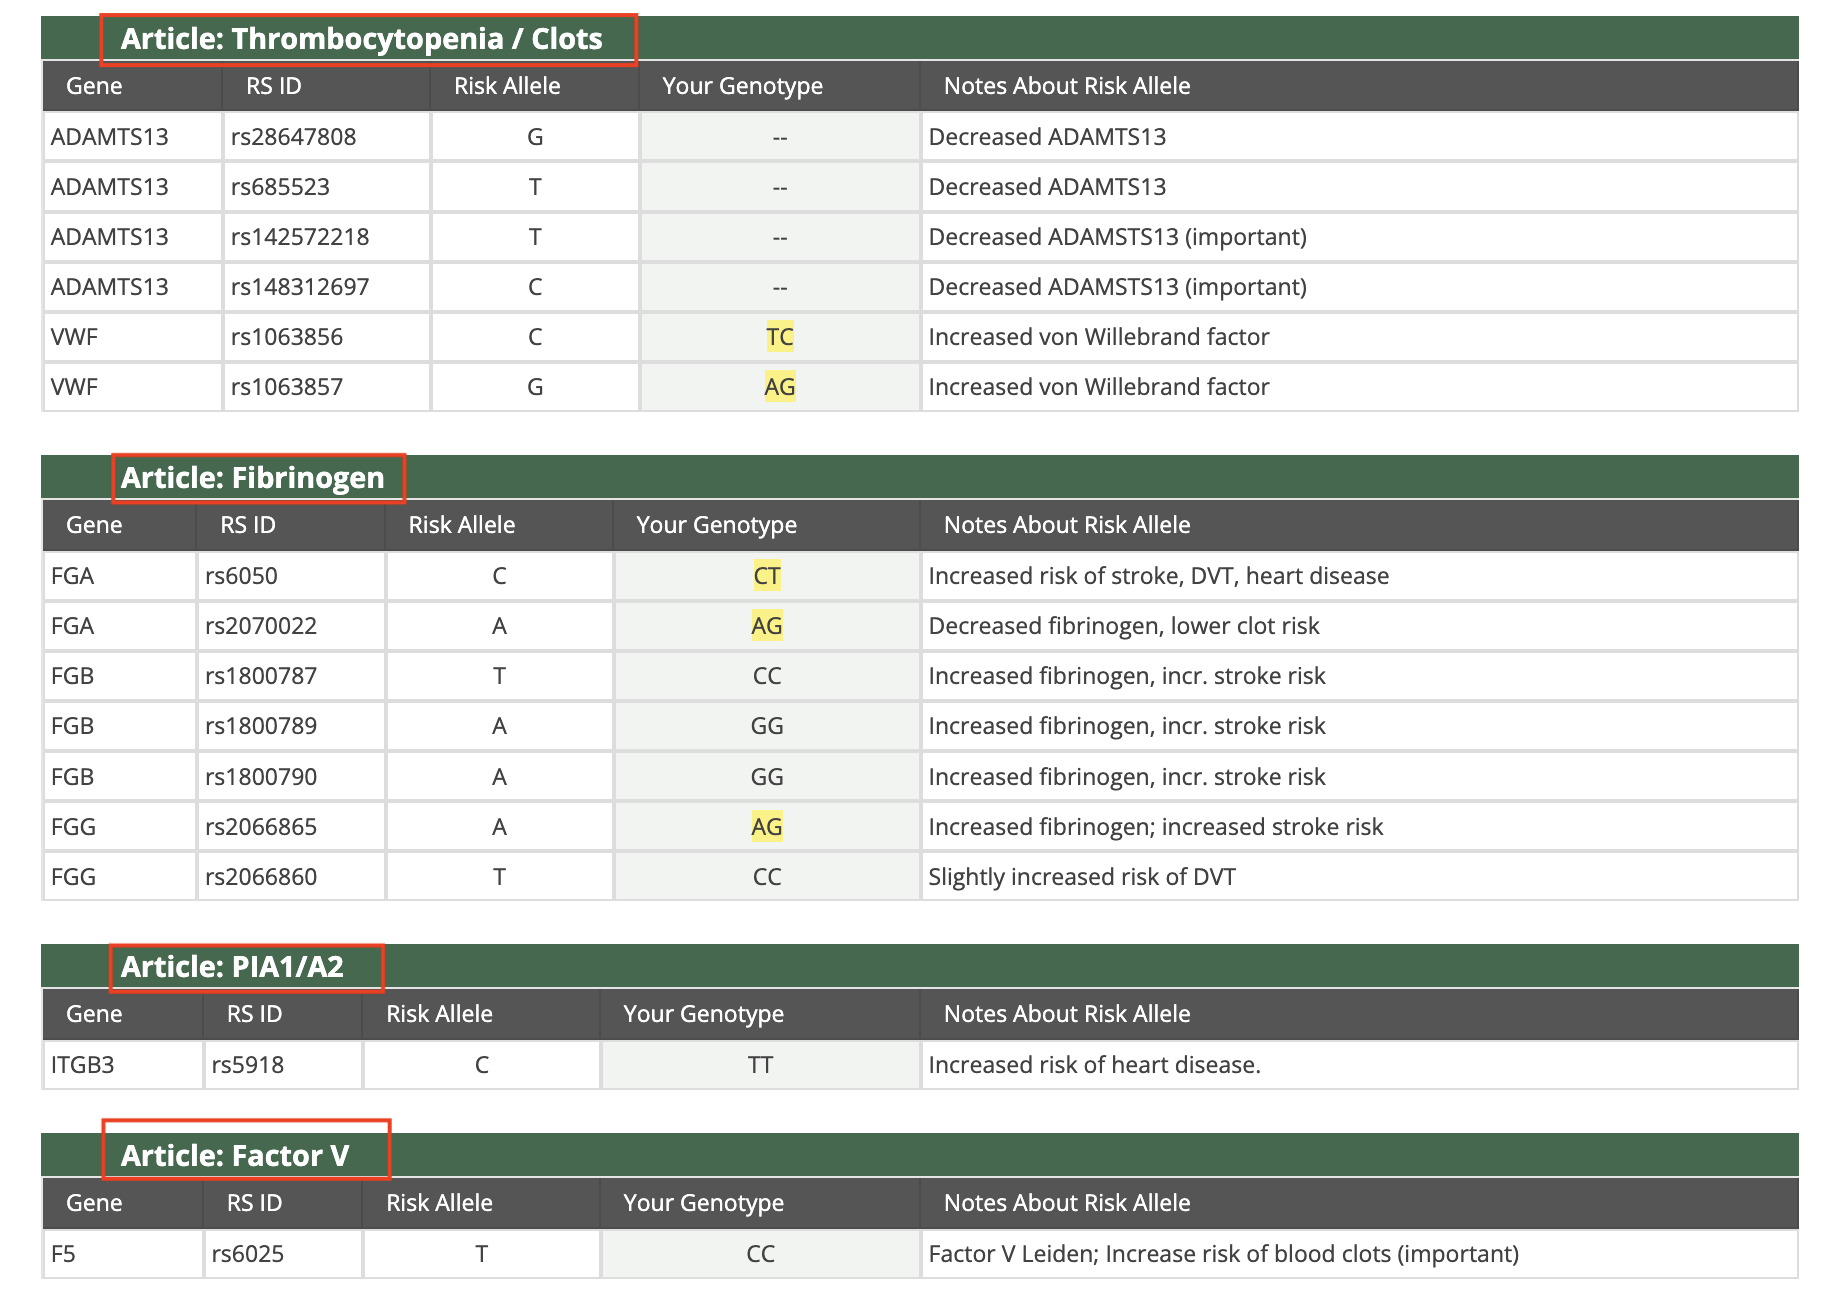
Step 3) Choose a report.
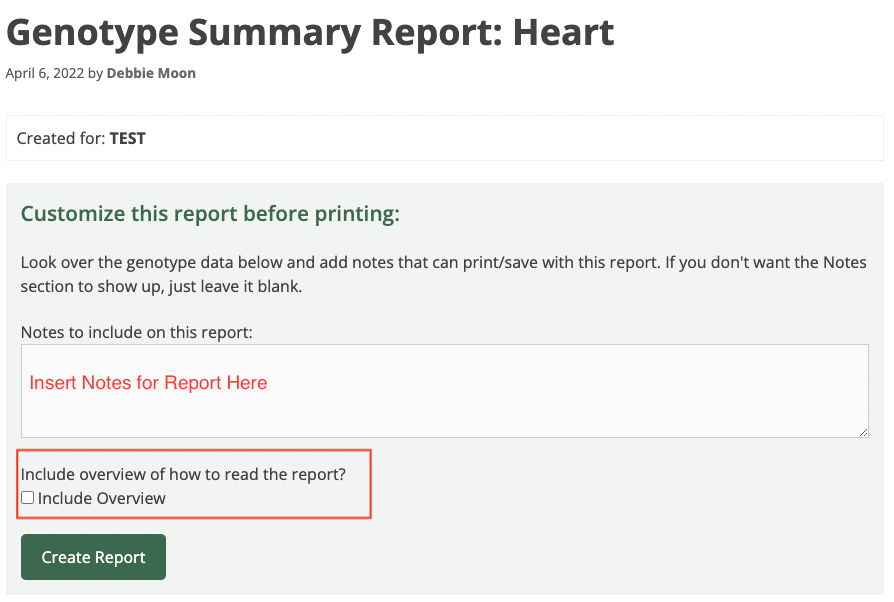
Step 4) Before you print, you have two options.
- You may add notes for the report. Type them into the text box.
- You can include an overview of the topic.
Both options will be visible before printing. The example is using the Heart Disease Report.
You may now click Create Report.
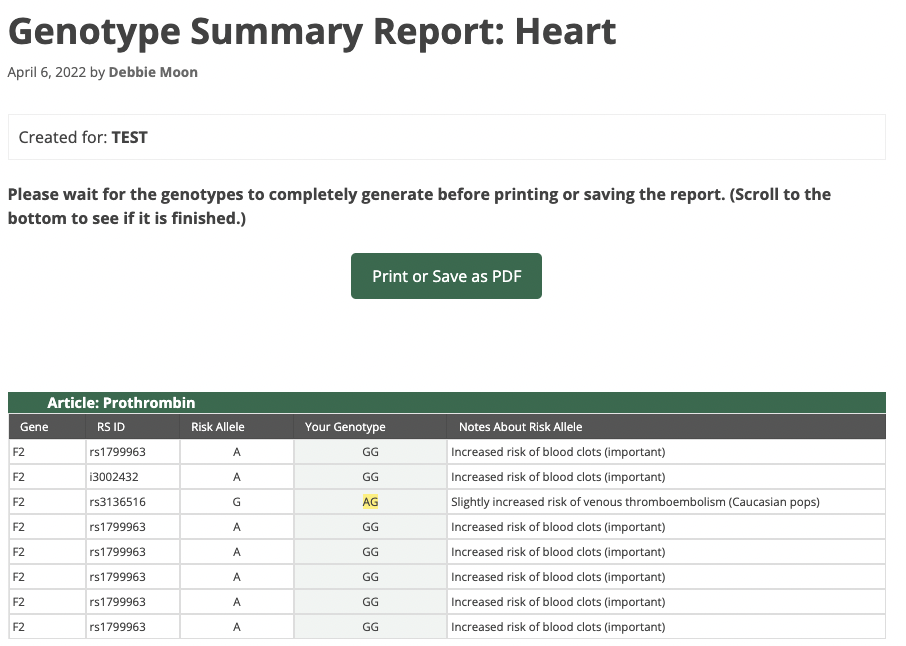
Step 5) When the report has been generated, you may select Print or Save as PDF. The example below does not include notes or a topic overview.
You must wait several seconds before saving or printing to ensure the genotypes have been generated. Try scrolling to the bottom of the report to see if it is generated completely.
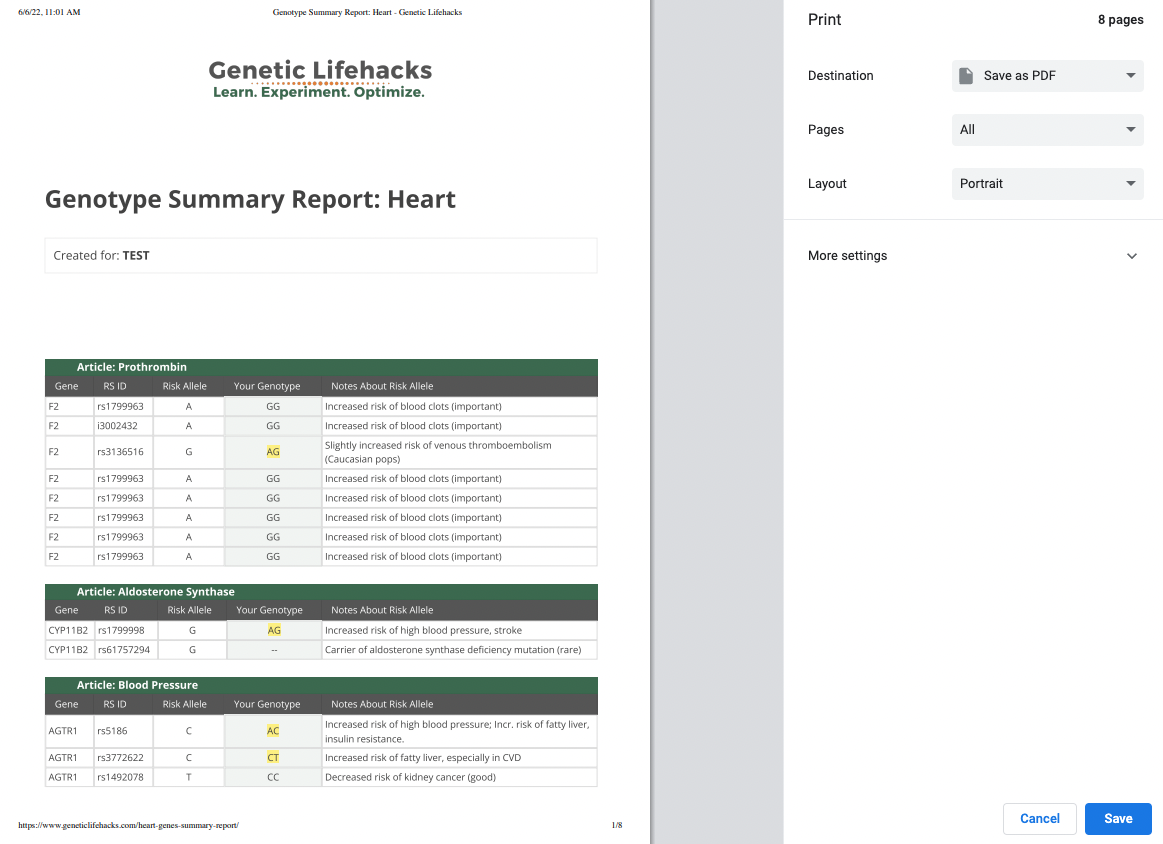
Step 6) Once you click the Print or Save button, your browser will prompt you with printing options. Choose to either Save as PDF or Print in the destination dox. The generated report will be visible with all your preferences, such as Created For, Notes, and Topic Overview.
(*See note at the bottom of the page for the privacy-first reason why we are using the browser print/save options)
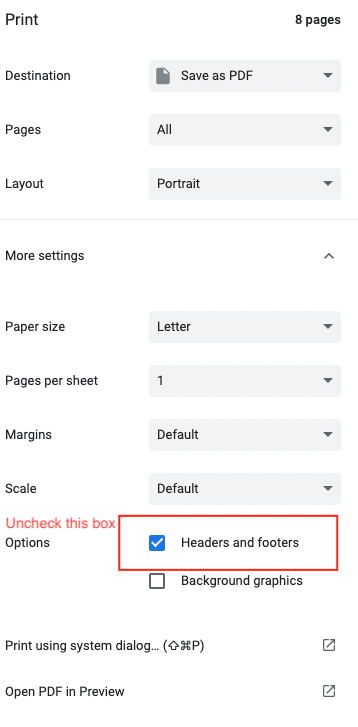
Step 7) To remove the URL and date, before you Save or Print, select Settings.
Under Options, ‘uncheck’ headers and footers. It will remove the URL and date from the report. In the example above, you can see the URL and date at the top of the report.
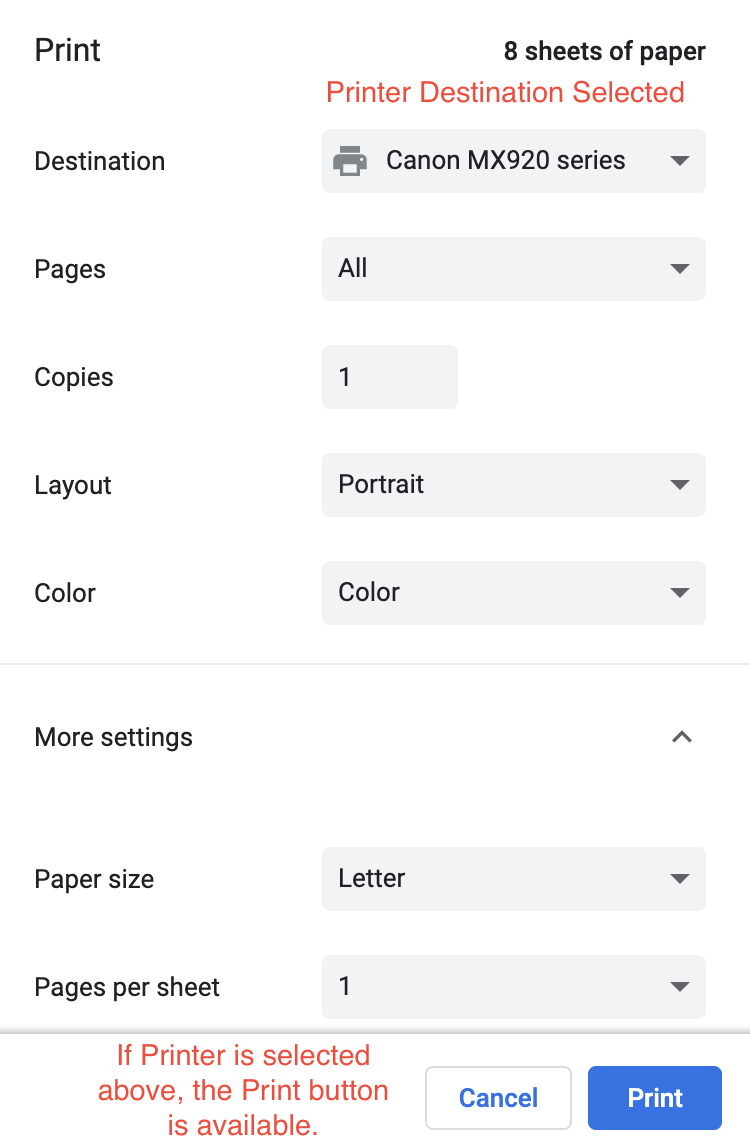
Step 8) Now you are ready to Save or Print your report. The example shows the selection of a printer in the destination box. The above example shows Save as PDF in the destination box. Depending on your option, you will have a corresponding Print or Save button to generate the report.
Step 9) Your report is ready for viewing. As a PRO Member, you may generate as many reports as you need for your clients or family. As a note, each article title links back to the article. When the report is saved as a PDF, these links remain for easy access to the information.
*Why use the browser settings for printing or saving?
Data privacy is a big priority with genetic data. To put it simply, websites that have handy “Create .pdf” buttons often are using third-party software to generate the PDFs. This violates our data privacy policy.
When reports are generated and printed through the browser, your genetic data is not sent to Genetic Lifehacks — and it is not shared with third party software developers. You retain control over the data.
Did you know?
When you use Excel or Word to create a PDF, the information is transferred to Microsoft servers. “Connected experiences that analyze your content are experiences that use your Office content to provide you with design recommendations, editing suggestions, data insights, and similar features.”[ref]